Showing posts with label make-up. Show all posts

29 October 2011

How to: Create that no-makeup look

When we ask guys what their ideal girl is, usually, the word simple is on the list. When we ask them to define simple, it usually means that the girl shouldn't put on makeup.

Wrong.

What guys mean is that they want that no makeup look. There are a number of ways you could do it, but here's how I do mine :)

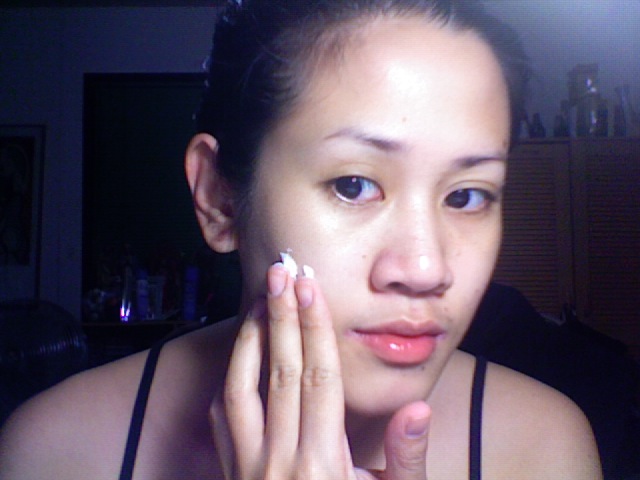
Consider yourself lucky because I never post pictures of me without any makeup on! Haha, just kidding. Anyway, here's how I look like without anything on my face.
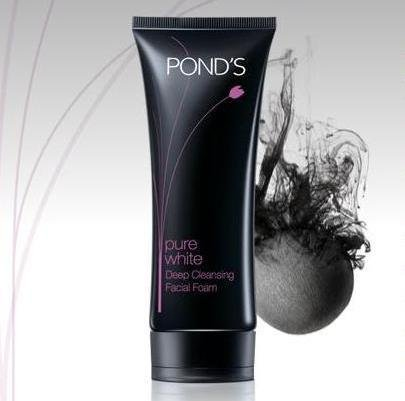
The first thing you wanna do is moisturize. Choose a day cream that's compatible with your skin type. As for me, I use Nivea Visage Sparkling White Day Care.

I'm the kind of girl who puts foundation daily. But I also want my skin to breathe so I use a light one with little-medium coverage, Maybelline New York Clear Smooth Aqua Foundation in Natural Beige. Make sure to cover every bit of your face and don't leave out the hairline. You can also put concealer afterwards for pimple marks, etc.

Next thing I do is draw my eyebrows out. If you noticed in the previous photos, my eyebrows are practically non-existent. Shaped brows frame your face and give you a better look so master how to do this if you have thin brows. If you have thick brows, be sure to groom them :) Shaping your brows also takes a lot of practice! It takes time to master it using different mediums (brow shadow, pencil, etc). In my case I used Maybelline's brow powder.

I didn't take a picture anymore but I brush on mineral powder after the brow step. I use Maybelline New York Clear Smooth Minerals in Natural Ochre.

  It's an optional step, but you might want to brush on brow gel or clear mascara over your newly shaped / drawn brows to keep them in place ;)

Only if you want to, you can dust highlighter on the inner arches on your brows, inner corner of your eyes, and lower lash line. It doesn't show much on the picture, but it glimmers in the sunlight! :)

If you haven't mastered this step yet (eyeliner on the upper lash line), I suggest you give it more practice. It would only hassle you to make mistakes, especially if you're using a waterproof liner. I do this to brighten my eyes and give it more definition. You can use whatever liner you want. On a daily basis though, I prefer using a pencil liner cause it gives a more smudged look rather than a precise line when using liquid liner.

Curl your lashes!!! Never forget this!!!
Apply your preferred mascara. If you know it's going to be a hot day and you'll be in corporate attire like me, use a waterproof formula to avoid "raccoon" eyes. If you don't have one, coating your regular mascara with a clear one might do the trick. I use Maybelline New York The Falsies Volum' Express Hydrofuge.

We're almost done! To give you that glow, apply just the right amount of blush on the apples of your cheeks. Apply your preferred color! Tip: If you feel like you have big cheeks, don't be afraid to contour your cheek bones by applying bronzer just below the apples of your cheeks. Just make sure to blend it with your blush to avoid harsh lines.

You can skip this step if you want, and you still have created your no makeup look.
To apply a color lighter than your lips, put a bit of foundation or concealer on those puckers to even it out with your skin color. I just use residue foundation from my foundation brush.

Apply your preferred color :)

Now scroll up to first picture....


And compare it with this one:
Lastly, put down your hair and flash those pearly whites!! We're done! ;)

If you still think absolutely no make up is the best way to go...
Well, I don't know what to say about that! :)

22 October 2011

Stress reliever

Here's how I did my makeup yesterday. Eyeliner and nude lips!
At night I went to watch a basketball game with papa. Here are some pictures I took:

Danny Siegle


And I was seated not far away from Bimby! Hahaha

11 September 2011

Every girl should know that it's a crime to sleep with makeup on

You guessed it right! I'm going to talk about makeup removers!
The title says it all.. Every girl should know that it's a crime to sleep with makeup on.
No one wants to wake up with blotchy, oily skin and smudged mascaras and eyeliners, right?


Coles Make-up Removal Pads
I bought this one in Australia and had to bring like a hundred of them here because I love them and I don't think I've ever seen a product like this in our local groceries. Before I discovered these, I used to only remove my makeup using cotton balls which can be a little irritating sometimes because of the fibers!

Luckily, while browsing the beauty section of Shopwise, I discovered something similar!


Belle Purity Cotton Pads
Of course, you can see the difference in quality (fibers are more visible, but better than plain cotton balls of course!) but overall, it works just the same.


Left: Coles
Right: Purity

Together with these, I've also recently used a new makeup remover which is this one:


(I've tried google-ing it but no results came out so I'll just write what's written on the bottle)
S.A.N.E. Simple and Natural Essentials Aloe Vera & Chamomile Eye Makeup Remover NORDSTROM

Unlike other makeup removers which are liquid in form, this one is has a gel-like substance which allows you to use less of the product in one go. Anyway, I can't really say anything special about this product except for its substance form- it works just the same as other makeup removers I've tried.

Whatever you decide to use, one thing's for sure: never ever go to bed with makeup on!
It destroys your skin by not allowing your pores to breathe therefore they won't rejuvenate and replenish as much as they would while you sleep.

Well what if you came from a party and you're really drunk and too tired to complete your nightly regimen? I suggest you have these products ready on your bedside table, just in case!

How to: Clean your makeup brushes

When I first started putting on makeup, I resorted to only using applicators that come with the product. Often, it would be messy and difficult to apply. So when I got my first ever makeup brush set, I took an oath to fully take care of it. That meant: proper storage and proper cleaning.

Usually, I clean my brush set once a month (since I use them almost everyday) and the brushes that I use the most (powder brush, blush brush, eyeshadow brush, crease brush, angle brush), twice a month.

If you do want to clean your makeup brushes, you will need:
- makeup brush cleaner or mild soap (I suggest baby soap such as J&J)
- water
- medium-sized container
- towel or tissue (whichever you prefer)

When I clean my brush set, I opt to use a proper cleaner (I use this only once a month):


I currently use BeautyPRO Professional Make-up Brush Cleaner
[ I'm not sure if this particular brand is available locally, but there are numerous makeup brush cleaners that you can buy in beauty counters and shops ]
It's very easy to use- just apply to bristles (don't fully immerse makeup brushes) and wipe with a towel or tissue.
Do the same steps when using mild soap.

When I thoroughly clean my brushes, I use both the brush cleaner and the mild soap.


Mix the mild soap (I use J&J's Milk Bath) and water in the container. Do not fill container to the brim. Again, do not fully immerse the brush into the mixture. Just dip the bristles and wipe onto the towel or tissue. Repeat as needed.

Do not forget to reshape brushes while still damp to avoid deformity. When done cleaning your brushes, place them on the counter top with the brush heads hanging to dry.


08 September 2011

Product Review: Majolica Majorica Lash Expander Frame Plus Mascara

If this is the first time you've heard of this brand, it's a Shiseido sister company that has been introduced to the Philippine beauty counters.


I didn't choose this first hand, by the way- it was a gift from my papa's girlfriend, so I don't have any idea about the effects of this mascara.


This is the brush picture on the packaging. You're supposed to apply the mascara in two steps- using the inner curve first (zigzag) and using the outer curve to remove any clumps.


Before I even tried it, I already doubted its magic. I'm not fond of comb-brushes for mascara because it doesn't give me volume (I have long but thin lashes). 


Here's what my eye looks like without makeup. My lashes aren't visible- they're not naturally curled.

Following my mascara routine, I curled my lashes before applying the mascara.
Tip: While a lot of beauty experts say that we shouldn't curl our lashes after putting on mascara, we actually can- depending on your lash strength. Remember to let the mascara dry first before curling to prevent breakage. 


Unedited photo of my eyes after applying the mascara
* Single coat on top lashes and very thin coat on bottom lashes

Pros:
- While I'm not raving about the volume, the visibility is definitely there. Reminds me of the fiberwig mascara I read about (and been wanting to get my hands on!) that adds length and volume to the lashes.
- Personally, I really didn't see any advantage to the comb-like brush and I still prefer the fluffy ones, but it does make the clumping go away.
- Cute packaging- it's Japanese, what do you expect! :)
- No medicated smell unlike other mascaras

Cons:
- Doesn't do much on volume

I'd give it a 4/5

06 May 2011

Skin care is the best gift you can give yourself everyday

I once read that men wake up every morning as good looking as they were when they went to bed. Women, on the other hand, somehow deteriorate during the night. That's because most of the female population put a lot of gunk on their faces! And that's why every girl who knows how to put makeup on should also know how to care for her skin. Sure, correctors, concealers and foundations are designed to cover up blemishes, pimples, dark spots and other skin flaws. But sans the makeup, we should be feeling good about how the way our skin really is!

One of the most important beauty secrets is to never sleep with makeup on. The trick is to remove all the gunk on your face before starting your beauty regimen. Recently, I've been using Estee Lauder's Take It Away Gentle Eye and Lip Long Wear Makeup Remover. 


I love this product because it's really as gentle as it says it is (doesn't cause any breakouts!), yet it still is capable of removing long wear makeup. I've been saving up to buy a new makeup remover since I'm almost done with this bottle and I'm going to try Clinique's Take The Day Off Makeup Remover.


I've read somewhere that this is the best makeup remover out in the market so I gotta see for myself!

The next step, and the main point of this entry, is choosing the right cleanser for your skin type. Now it really depends on whether you have oily, combination, or dry skin but I think you should always have at least two kinds of facial cleansers in your home kit. The first one should be something that's a little strong and something that will surely leave your skin free of debris. Currently, I'm using Pond's Pure White Deep Cleansing Facial Foam with Activated Carbon and Vitamin B3.


I was first attracted to this product because of its TVC. It was just advertised so well that I had to try it. The product promises to effectively cleanse your face by means of the activated carbon and I gotta tell you that it does just that! I use this facial cleanser only when I've put makeup on for the day and it leaves my skin feeling extremely clean and fresh. My only problem with this product is that I feel that it's a little too strong for my skin and that's why I follow it up with Johnson's Baby Milk Bath.


So I can be sure that I have squeaky clean skin that's feeling soft and moisturized.

The other facial foam should be less strong than the other one because this one is intended to clean your face and keep it moisturized for when you are just at home, or for days when you don't put makeup on. The one I'm currently using is Dove's Beauty Moisture Facial Foam with 1/4 moisturizing milk. 


I really love products that contain milk so I often purchase those. I strongly recommend this facial foam because it did do wonders to my skin. Not only is my face cleansed and moisturized, it also smells so good! Another good cleanser that I know of is Cetaphil.


This is a brand I swear by with my entire life. It's as gentle as it gets plus it reduces breakouts. The only problem I have with this product is that it doesn't form bubbles, so it doesn't feel like it cleanses your skin that much. Its scent is also a little bit medicated.

I think that cleansing your skin before bed is the best thing you can do for yourself everyday. Never get too tired or too lazy to do it because if you do it religiously, you'll be thanking yourself in no time :-)

All photos courtesy of Google Images

29 April 2011

Lip Delight!

My life has been boring lately and I've got nothing to do but download torrents all day and watch them all night. Plus I haven't posted in a while...

Anyway, every one of my friends know that my lips chap really bad all year round (if you're my friend and you don't know this fact then you should be ashamed of yourself! Hahaha). It doesn't matter what the weather is- it may be sunny or it might be rainy- it's all the same to my lips. Well it's really because I'm not a water person. I don't drink water on a daily basis- screw eight glasses a day! I can't even finish one. So like I always say, I love moisturizing my body and my lips are not an exception!

Here are some of my favorite lip balms- the ones I haven't finished at least! (Sorry for the low photo resolution!)

1. Burt's Bees Beeswax Lip Balm (Pot)

Photo courtesy of Google Images

I've used Burt's Bees ever since I was in high school. It's great- everything a lip balm should be. It moisturizes my lips and brings it back in tip-top shape after a few applications. It's a little bit minty too (it contains peppermint oil and duh, beeswax) but not so much that it hurts when my lips are too chapped.

2. Simple Pleasures Lip Balm (in Grapefruit & Mint and Coconut & Vanilla Bean)

Photo courtesy of Google Images

So these two lip balm sticks actually came from a set that I bought from Rustan's. They have so many flavor varieties that I haven't heard before and that's what got me intrigued. The photo above has a different packaging from the one I have now, but it's just the same. You know how you always see those lip balm sticks to be a little bit dry and hard (it's because we all grew up with Chapstick!)? These ones are different because you can really feel it moisturizing your lips upon application but at the same time, it's not that greasy. I bring either one of this with me in my everyday bag for emergencies. You never know who you're gonna kiss! :-)

3. Maybelline New York Lip Balm (in Cranberry Jam)

Photo courtesy of Google Images

I always rave about Maybelline products in my makeup reviews but I'm not too happy about this one. I got this as a give away from a party I attended last year so I sure gave it a try. It doesn't really help my chapped lips in any way, but I guess it could be helpful for those who don't have lips as chapped as mine. It's also my only lip balm that gives a little bit of lip color so I'm not really a fan of that since I like to just put a lot of gunk on my lips.

4. Ilog Maria Honeybee Farm (Honey, Beeswax & Propolis) Lip Balm

I wasn't able to snatch a photo of this on the internet because it's a local product. I got it from my papa's girlfriend so I bet it's from Ilo-Ilo. I love putting this on when my lips are already moisturized because it's very minty and cool, but it's NOT good to put on when you have intensely chapped lips cause it's just gonna sting. I bet I could even use this as a lip plumper alternative. It also has a strong, medicated smell but it's not too bad.

5. Rituelle Lip Balm (in Vanilla)

Photo courtesy of Google Images

This one was from Australia. I've tried it only a couple of times so I can't really judge its healing powers. What I can say for now is that it's a bit hard to apply because (1) it's in a pot and (2) it's a little bit hard. I think I have to warm it a bit so it can gel a little for easier application. Also, the pot lid is a little too hard to open. I love the vanilla flavor though.

6. MOR Sorbet Lip Delight

Photo courtesy of Google Images

Here's my ULTIMATE FAVORITE!!!!!! MOR cosmetics is truly a lip delight when it comes to lip balms, I swear to God! I just love this balm to bits!!!! And I cannot even stress this enough. This also came from Australia, I got it last year- and I'm halfway through the pot. It's a translucent gel-like balm that's really easy to apply. It looks like petroleum jelly but does wonders better! If I could just rub this all over my body, I would! The smell is not medicated at all too, and it only takes one night to heal my lips. The only thing I don't like about this is that it's a little too greasy to apply in daytime so I only use it at night, after I've cleansed, toned and moisturized.

7. MOR Lip Delight Baume Pour Les Levres

Photo courtesy of Google Images

Since I really loved my lip delight balm, Ate Kathy gave me another pot before I left Australia. It has the exact same effects as my old one except that this one has more of a white color rather than translucent, it has a fruity smell AND the packaging is so elegant! Those little silver victorian-inspired swirls aren't just stickers! They're actually embossed. I just know that this is going to be my next favorite when I get to finish the other.

XX


20 April 2011

Product review: Maybelline New York Superstay Silky Foundation

I'm a self-confessed makeup buff and I go gaga for liquid foundations, specifically. My latest buy is Maybelline New York's Superstay Silky Foundation.


Photo courtesy of Google Images

This certain foundation is packaged in such a way that a half is the actual foundation and the other half is a translucent silky coverage extender that you get at once with one pump. I got quite intrigued with the packaging, and that's why I bought it in the first place.

The translucent coverage extender works like a primer and it blends with the foundation easily. What I like about this product is that I don't have to put on moisturizer before applying and it still makes my skin look hydrated (but not oily!), plus it comes with SPF 12 sunscreen. The foundation has medium to full coverage, which I love. The product promises a 16-hour flawless coverage which I can attest to as I've worn it five straight days under the heat of the Philippine sun. I perspire heavily, but it doesn't come off easily. 

There are two things I don't like about this product: (1) Though I love the idea of a coverage extender that blends with the foundation as applied, the single pump on the product is not lovable. At the back of the product, it says that at first use, you have to pump several times to get the product dispense evenly. But even after several uses, it does not give out the same amount of both the foundation and the coverage extender unless you shake the bottle. (2) As I said, I love foundations that give maximum coverage, but this product does feel a little heavy on the face. It does not give me a cakey look though, so that's a plus. Still, I wouldn't recommend this product to ladies who have oily skin.

Overall, I love this product and I will continue to use it. I do hope Maybelline starts making this product available locally so I can easily purchase one again when I run out. I am once again taken by another Maybelline New York product! Four and a half stars :-)